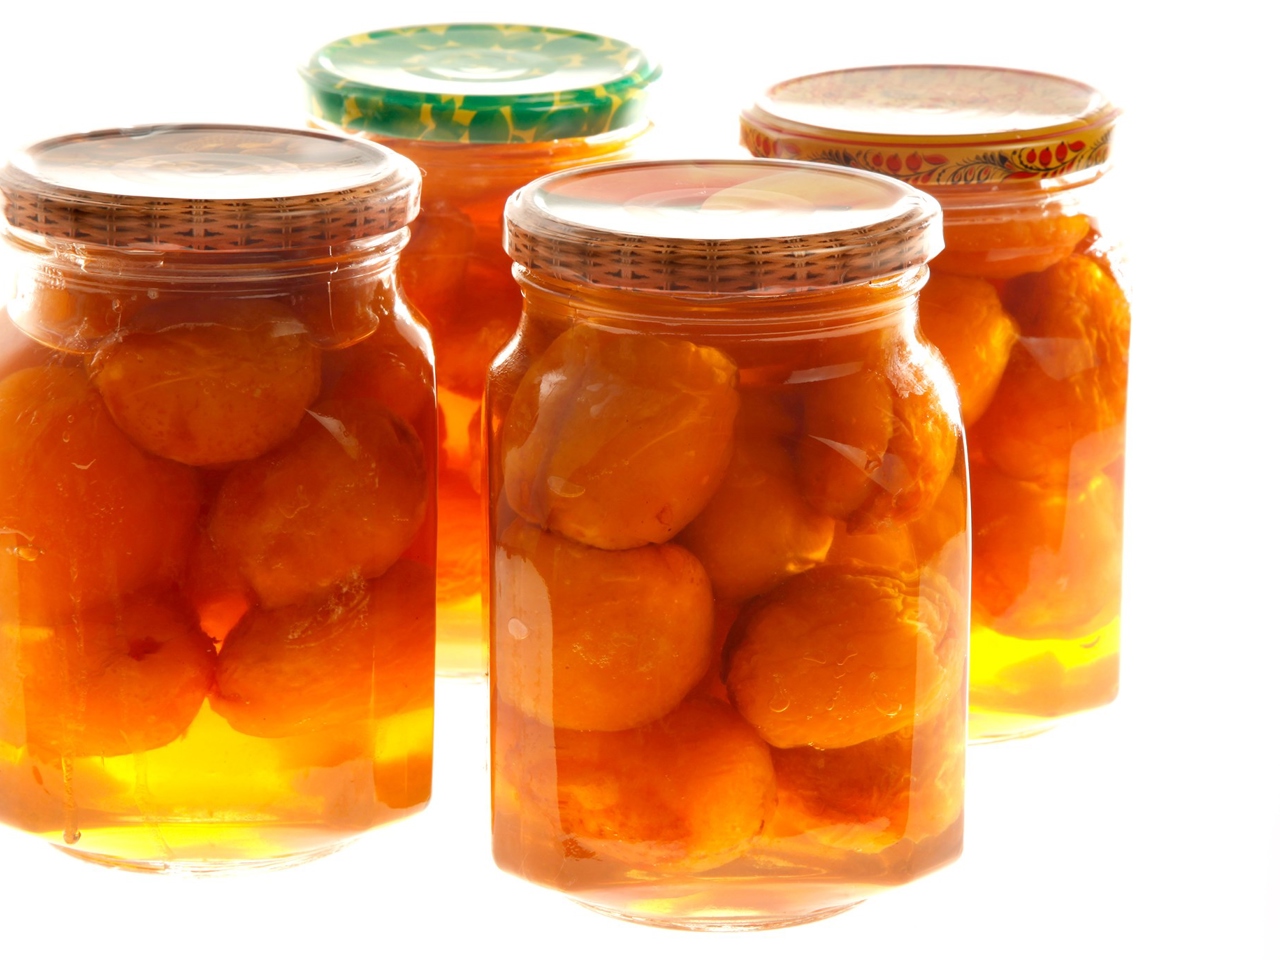
Apricot Jam with Pits Inside
⏳ Time
3 hours + 3 days
🥕 Ingredients
2
🍽️ Servings
10
Description
Jam is the sweetest and most diverse way to stock up on berries and fruits for the winter. The cooking process is a meditation in the Russian style: you can't rush or multitask while making jam. Some recipes require a single, yet lengthy approach, while others involve a brief, but daily practice.
Ingredients
- Pitted Wild Apricots - 2 lbs
- Sugar - 2 lbs
Step by Step guide
Step 1
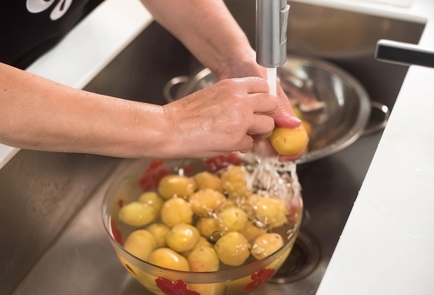
Wash the apricots thoroughly and dry them. There are cultivated apricots with sweet kernels inside the pits, and those are the ones you need. Some smaller apricots have bitter kernels, which are not suitable for making jam. It's best to ask the seller about the type of pits, as it's hard to tell just by looking. Generally, the larger the apricots, the more cultivated they are, and consequently, the sweeter the pits will be. It's better to choose apricots that are medium-ripe, even slightly green.
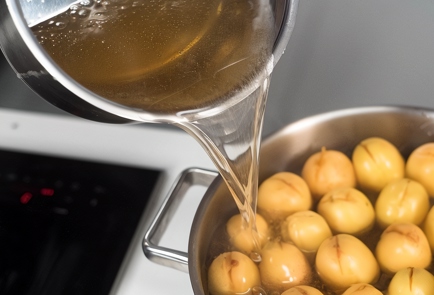
Step 10
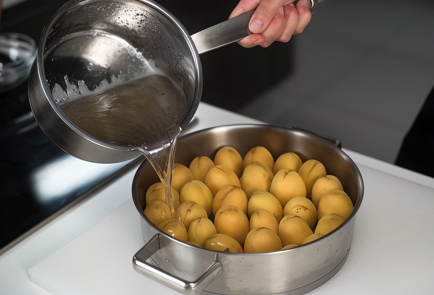
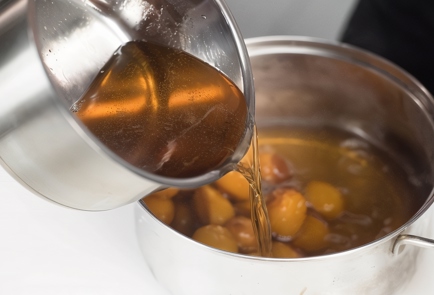
Pour the syrup over the apricots, ensuring each fruit is coated on top. Leave everything for 12 hours without covering it in any way, otherwise the apricots will become unattractive. During this time, they will cool down, release juice, and shrink slightly in size.
Step 11
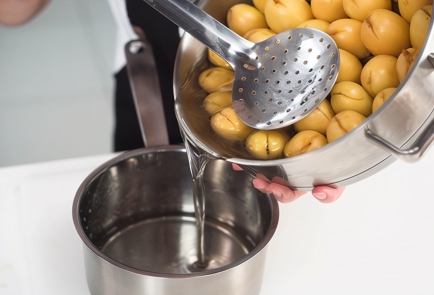
After 12 hours, drain the syrup into a pot.
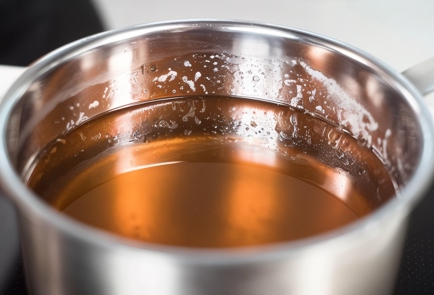
Step 12
Add the remaining 400 grams of sugar to it, place over medium heat, and bring to a boil. At this point, a lot of foam will form, which should be removed until the syrup is completely clear. Continue boiling the clear syrup for another 3 minutes.
Step 13
Pour the apricots again and let them sit for another 12 hours.
Step 14
After 12 hours, take out the apricots again.
Step 15
Drain the syrup and juice again. The syrup should have a consistency similar to liquid honey. Place it back on the heat, bring it to a boil, skim off the foam, and let it simmer for three minutes to allow excess moisture to evaporate.
Step 16
Pour the syrup over the apricots again and let them sit for another 12 hours. In total, the apricots should sit for 12 hours three times.
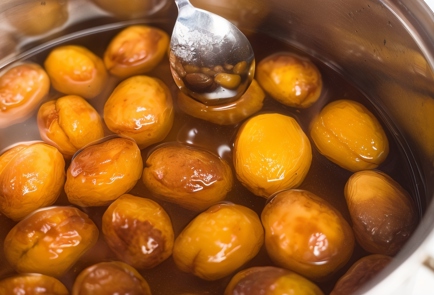
Step 17
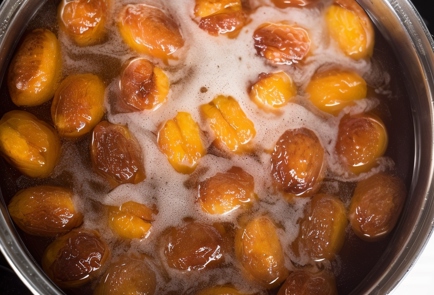
For the fourth time, boil the apricots directly in the syrup for five minutes. Gently stir the sugar that settles at the bottom, as it will dissolve during this time. Skim off any foam.
Step 18
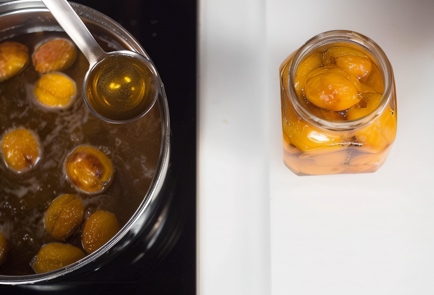
Transfer the apricots to sterilized jars and pour over the syrup. The jam is ready.
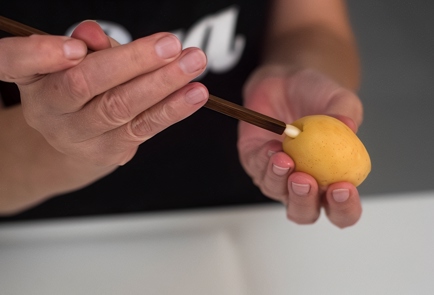
Step 2
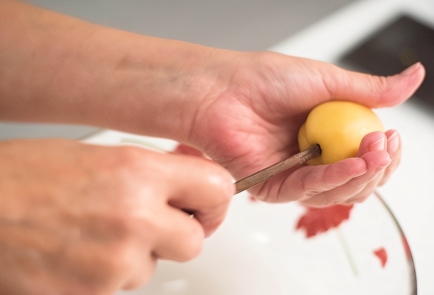
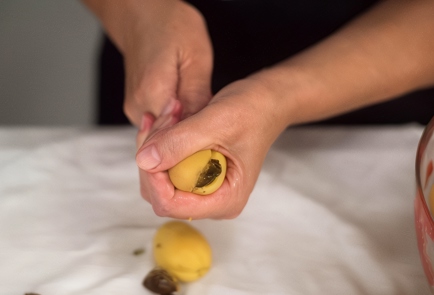
Remove the pits from the apricots. Eastern chopsticks work well for this. Use the thicker end of the chopstick to push into the spot where the apricot was attached to the stem, and push it inwards while holding the apricot firmly with your fingers. It sounds complicated, but it's actually very simple.
Step 3
On the opposite side of the fruit, the pit will pop out. It’s a good idea to involve someone close, as this will make the process go faster.
Step 4
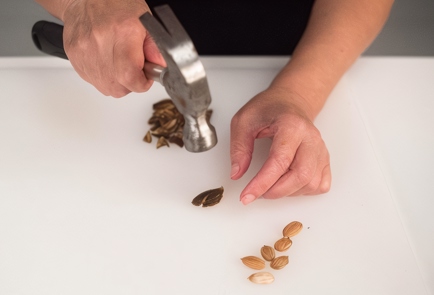
Crack the pits with a mallet and extract the kernels.
Step 5
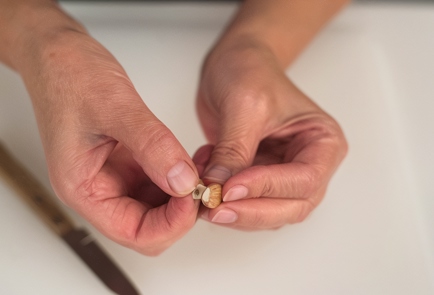
Remove the skin from the pits and cut away the part where the main bitterness is concentrated. To do this, slightly lift the thick edge of the pit with a knife and peel off the skin with the dark spot, as shown in the photo. Then you can clean the pit completely.
Step 6
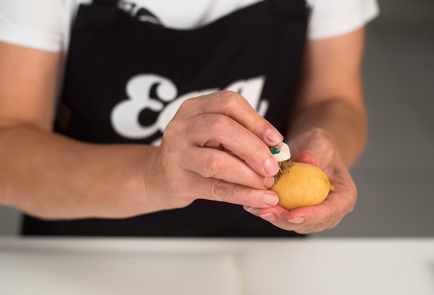
Next, the apricots need to be pierced so that they absorb the syrup better. To do this, you can create a tool: cut an eraser lengthwise and poke it with pins, creating a sort of hedgehog. Use this tool to pierce the apricots, trying to penetrate the flesh deeply. If you pierce the skin with something large, it will tear and fall apart, causing the apricots to lose their marketable appearance. This way, they will soak up the syrup while maintaining their integrity.
Step 7
Then use a stick to push the pits back into the apricots.
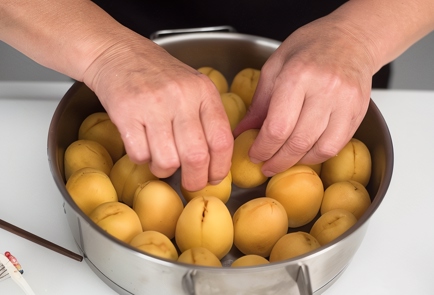
Step 8
Arrange the apricots in a saucepan, tightly packed, with the ends that were previously attached to the flowers facing up.
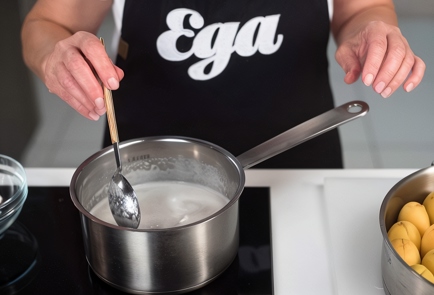
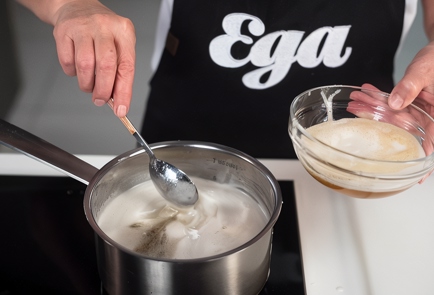
Step 9
Next, you need to make the syrup. For 1 kg of fruit, use 1 kg of sugar. However, there's a trick. First, take 600 grams of sugar, add a cup of water (that's 250 ml), and bring it to a boil, stirring constantly. When the sugar has dissolved, the syrup is ready.
Cooked This Dish? Share Your Delicious Creation with the Community! 🥰
Snap a photo and let everyone see your culinary masterpiece. Inspire others and showcase your skills!
Users Photos
No photos yet
Leave a Comment
Please log in to leave a comment.