
Pickled Apples with Cherry Leaves
⏳ Time
30 minutes + 20 days
🥕 Ingredients
6
🍽️ Servings
10
Description
Pickled apples are a vibrant Russian specialty, an essential attribute of historical feasts: open any classic literature and you will surely find mentions of pickled apples. This recipe comes from a culinary expert and founder of a popular American restaurant dedicated to traditional cuisine.
Ingredients
- Water - 5 qt
- Coarsely Ground Rye Flour - 1 glass
- Dijon Mustard - 1 tablespoon
- Coarse Salt - 2 spoons
- Apple - 4 lbs
- Cherry - to taste
Step by Step guide
Step 1
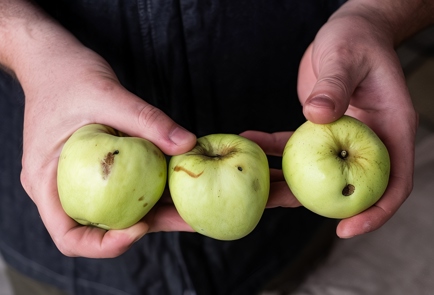
You should only use apples that have been picked; during the fall, apples can get bruised. They develop soft spots, which can lead to rot and spoil the entire batch. Avoid apples with wormholes or other damages. The fewer imperfections, the better the apples are for pickling. Apples like the ones in the picture should not be used. Wash the apples and let them sit in a cool place on cheesecloth or a towel for 2–3 days. Arrange them without stacking tightly to prevent them from starting to rot.
Step 10
After the apples have been soaked, they need to be kept in a warm place for 2 days (if the room temperature is around 68°F). If it is very hot — around 30 degrees — then one day in the warmth will be sufficient. If it is cold — in a room at 17–18 degrees — they should be kept for 3 days. After that, the container with the apples should be moved to the refrigerator or a cellar on ice, if possible — place it directly in the tray, and when the liquid stops overflowing from the edge of the jar, the tray can be removed. After a month, the apples can be taken out and eaten.
Step 2
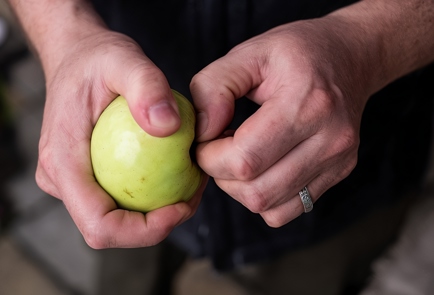
Remove the stems and any remnants of the blossoms from the apples.
Step 3
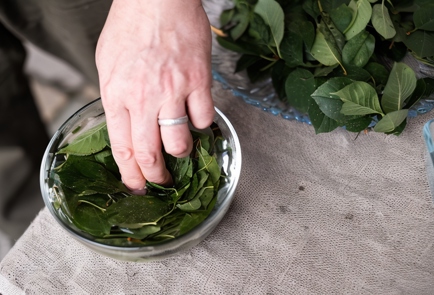
In the past, the bottoms of the barrels were lined with straw, which was also placed on top of the apples. Along with the straw, leaves were used, either currant or cherry leaves. When using a jar, there's no need to add straw; the leaves are sufficient. Rinse them in cold water. You can use the leaves fresh or dried.

Step 4
Take warm boiled water, rye flour, mustard powder, and coarse salt. Mix all of this in a bowl with a whisk. Lumps are acceptable; they will break down over time.
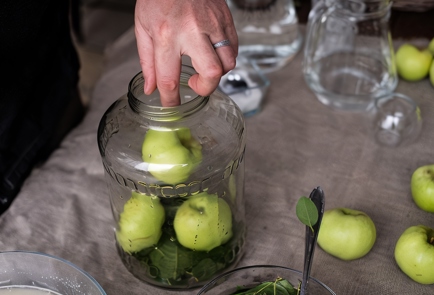
Step 5
Layer the apples and cherry leaves in a 3-liter jar: a layer of leaves, a layer of apples, a layer of leaves, a layer of apples, and so on.
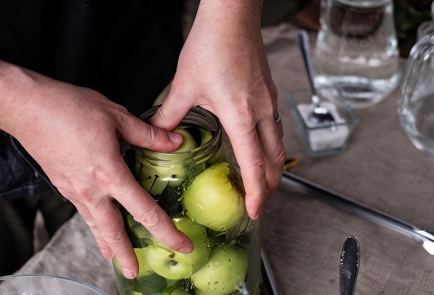
Step 6
Pack the apples tightly at the top of the jar.
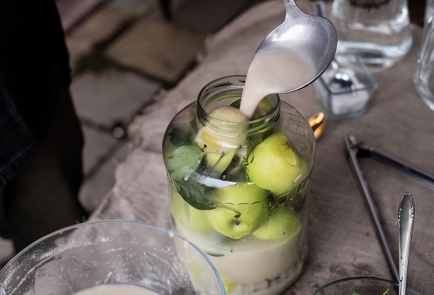
Step 7
Pour the mixture over the apples so that they are completely covered. Store any leftover mixture in the refrigerator, as it may be needed later.

Step 8
Cover the apples with leaves so that they are fully submerged in water.
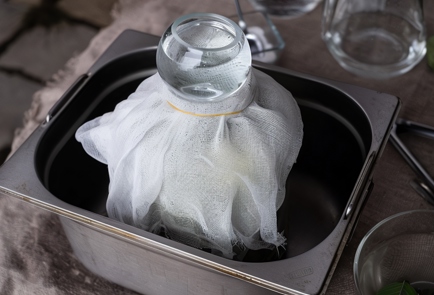
Step 9
Cover the jar with clean cheesecloth and place a weight on top; it doesn't need to be very heavy. The purpose is not to compress the contents of the jar (which is important in the case of sauerkraut, for example). The weight is needed to keep the apples submerged and fully in the water at all times. If the leaves on top begin to mold, remove them and replace with fresh ones. There is no point in sealing the jar, as a fermentation process begins inside. Some of the brine will be absorbed by the apples, while some will foam and overflow. This is why the jar needs to be placed in another container. If a lot of liquid spills out, add more brine (that's why it should be prepared in advance). Continue adding it until the process of the apples absorbing the liquid stops and no more liquid overflows. At this point, you can remove the tray. The refilling process may take more than a week. If the brine runs out, you will need to prepare more and pour it in.
Cooked This Dish? Share Your Delicious Creation with the Community! 🥰
Snap a photo and let everyone see your culinary masterpiece. Inspire others and showcase your skills!
Users Photos
No photos yet
Leave a Comment
Please log in to leave a comment.