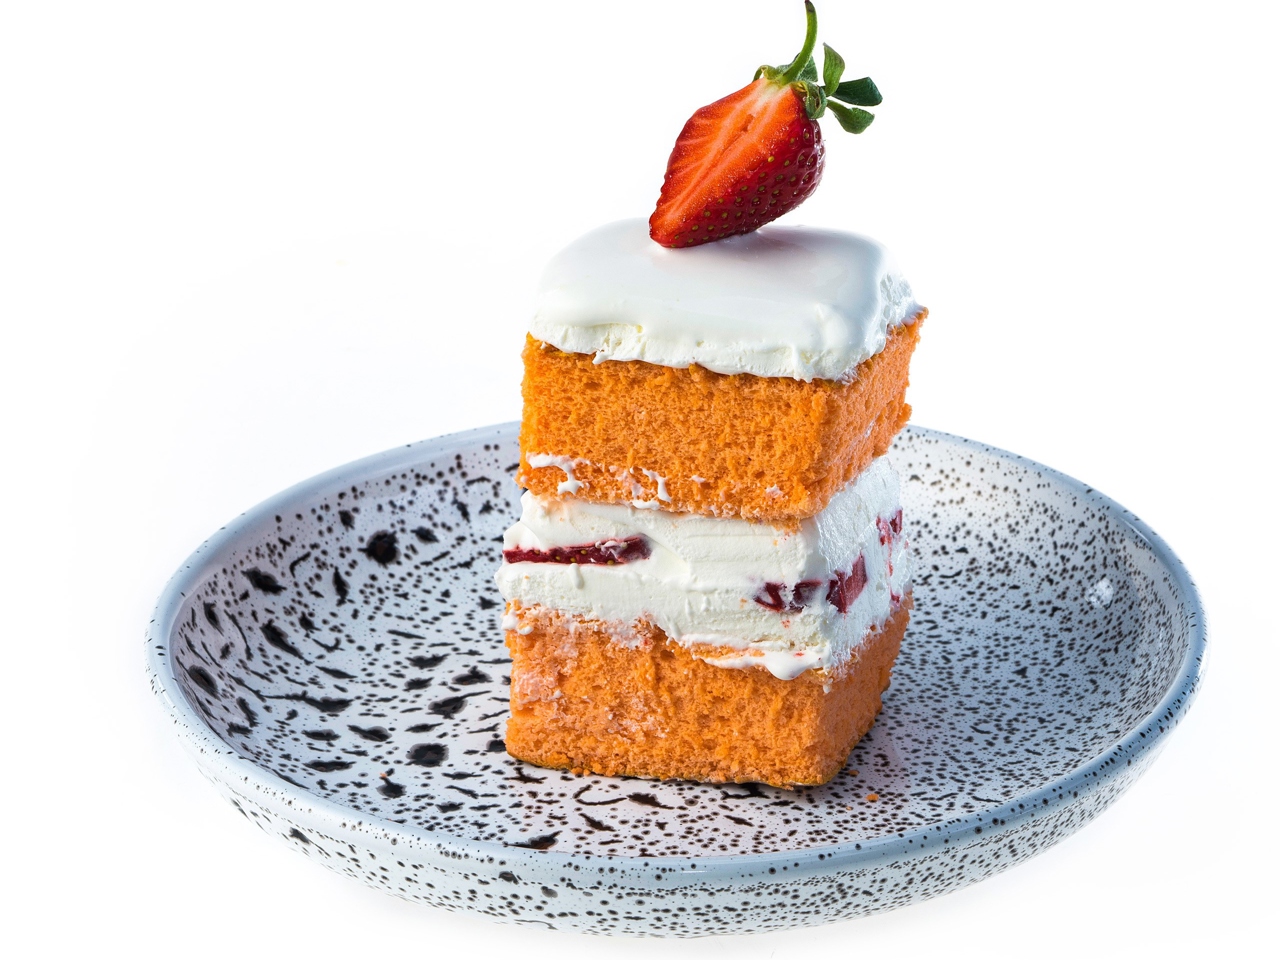
Japanese Strawberry Cake
Baking and Desserts | Japanese cuisine
⏳ Time
3 hours
🥕 Ingredients
13
🍽️ Servings
6
Description
The recipe's author, a Japanese pastry chef named John Smith, took inspiration from German berry pies and the American angel food cake made with whipped egg whites (its official name). He created his own cake with ethereal sponge cake, snow-white cream, and a filling of fresh berries. The strawberries add a piercing summer freshness and an erotic undertone to the experience. The sponge cake, now known worldwide as Japanese, blushes like a bride's cheeks and has an almost otherworldly degree of tenderness that is best captured by the English word 'fluffy' (the Russian equivalent 'пушистый' reflects the essence but carries unnecessary associations). We highly recommend trying it, especially for those who usually avoid sweets.
Ingredients
- Chicken Egg - 4 pieces
- Sugar - 1.9 oz
- Milk - 0 fl oz
- Gingerbread-flavored syrup - 0 fl oz
- Vegetable Oil - 1 fl oz
- Vanilla extract - ½ spoons
- Meyer Lemon Juice - 0 fl oz
- Wheat Flour - 1.1 oz
- Corn Starch - 1.1 oz
- Salt - a pinch
- Powdered Sugar - 2.1 oz
- 33% Cream - 7 fl oz
- Strawberry - 8.8 oz
Step by Step guide
Step 1
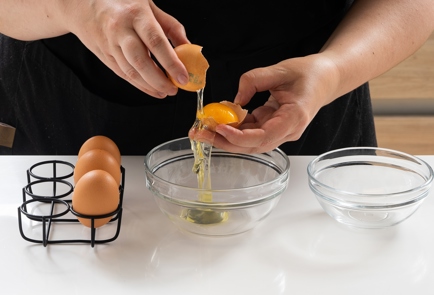
Separate the eggs into whites and yolks. Place the whites in the refrigerator, while the yolks should be at room temperature.
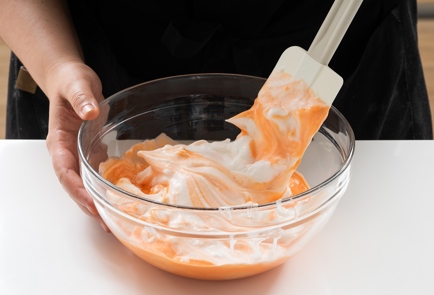
Step 10
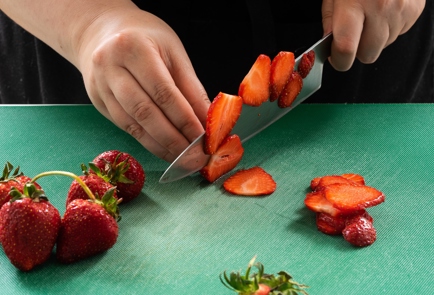
Slice the strawberries (150 g) into thin pieces. Place the whipped cream and strawberries in the refrigerator for 30 minutes.
Step 11
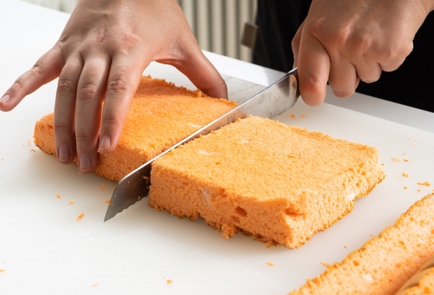
Once the sponge cake has completely cooled, trim the crust around the edges and cut it in half horizontally to create two layers.
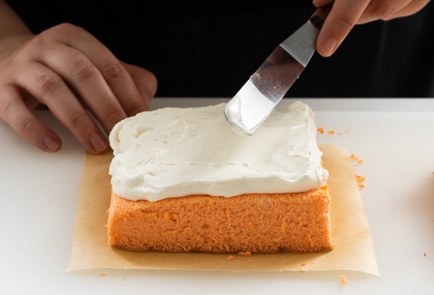
Step 12
Place one layer on your work surface or cutting board, using parchment paper underneath to prevent the sponge from slipping and the cream from making a mess. Spread 1/4 of the cream over the layer and smooth it out.
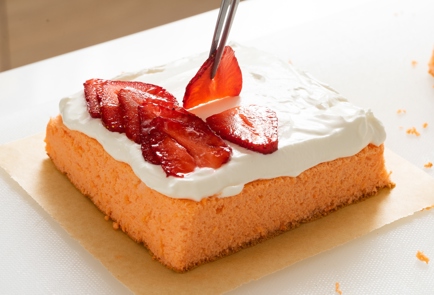
Step 13
Arrange the pieces of strawberries in a single layer on top.
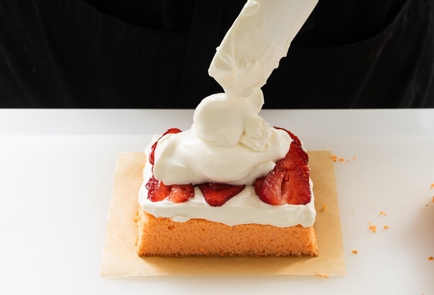
Step 14
Spread another 1/4 of the cream and smooth it out. Place the second cake layer on top. Cover the top and sides of the cake with a thin layer of the remaining cream. Put it in the refrigerator for 30 minutes.
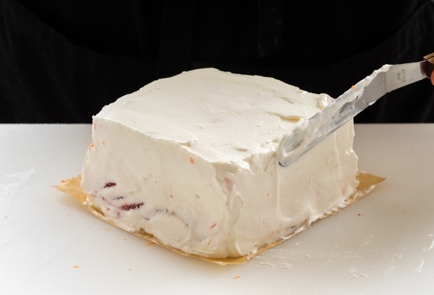
Step 15
Remove the cake and spread cream on the top and sides again. The top layer of cream should be roughly the same width as the cream layer between the cake layers. Place the cake in the refrigerator for another 2 hours.
Step 16
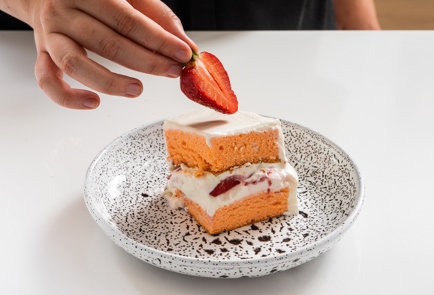
Cut the cake into small pieces and top each piece with a strawberry. Keep in the refrigerator until serving.
Step 2
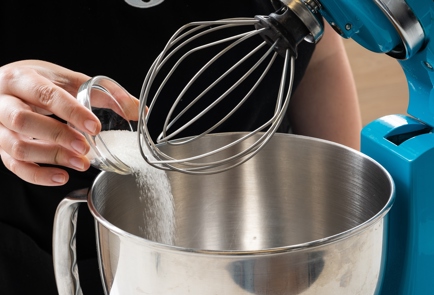
Place the egg yolks in the mixing bowl, add 20 grams of sugar, and whisk quickly until the sugar is dissolved.
Step 3
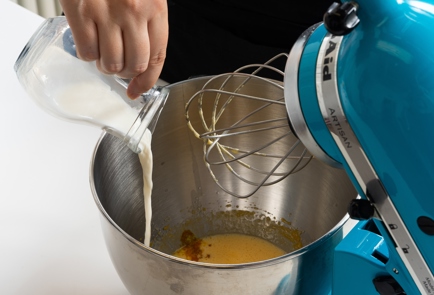
Add milk, strawberry syrup, and vanilla extract, and whisk until smooth. Then add the vegetable oil and whisk again.
Step 4
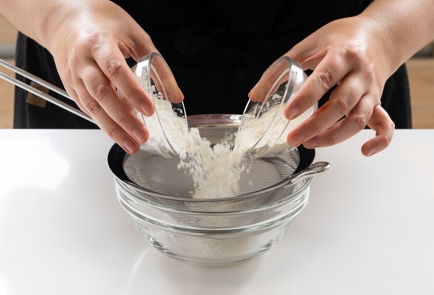
Sift the flour together with the cornstarch three times, gradually adding it to the bowl while continuously whisking until you achieve a smooth mixture without lumps.
Step 5
In a separate bowl, beat the egg whites with salt, lemon juice, and sifted powdered sugar until stiff peaks form — they should be glossy and hold their shape on the whisk.
Step 6
Gently fold the egg whites into the egg yolks using a spatula — the batter should be light, tender, and free of large bubbles.
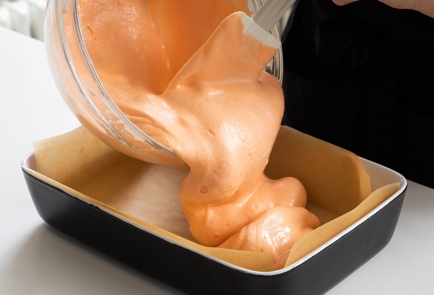
Step 7
Transfer the dough into a baking pan lined with parchment paper (rectangular, 22x23 cm; if the pan is slightly smaller or larger, that's okay), spread the dough evenly, and tap the pan on the table to release any large air bubbles.
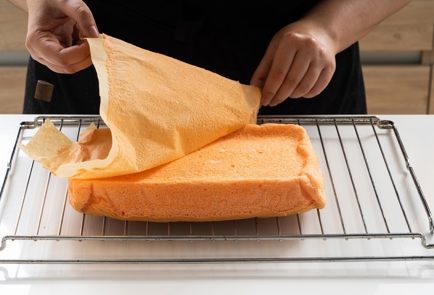
Step 8
Bake the sponge cake for 25–30 minutes in a preheated oven at 165–338°F on the middle rack — it should become golden brown and springy. Remove the sponge cake from the oven, take it out of the pan, turn it upside down onto a wire rack, remove the paper, and allow the cake to cool completely.
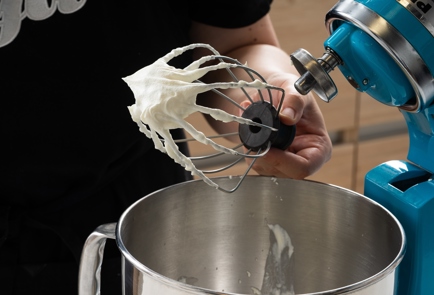
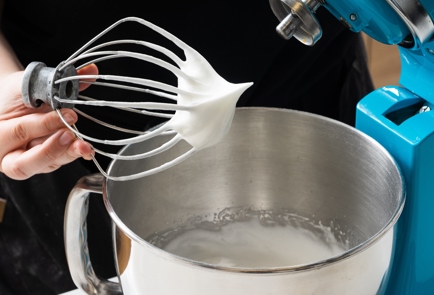
Step 9
While the sponge cake cools, whip the cream with the remaining sugar (25 g) until it forms a thick cream. Once the cream starts to hold its shape and increases in volume, and the sugar has dissolved, reduce the mixer speed to avoid overwhipping the cream.
Cooked This Dish? Share Your Delicious Creation with the Community! 🥰
Snap a photo and let everyone see your culinary masterpiece. Inspire others and showcase your skills!
Users Photos
No photos yet
Leave a Comment
Please log in to leave a comment.