
Perfect Croissants
Baking and Desserts | French cuisine
⏳ Time
5 hours
🥕 Ingredients
9
🍽️ Servings
20
Description
Frozen croissants should first be thawed — leave them at room temperature until they are fully defrosted, and only then place them in the proofing stage. If you put them in the proofing stage while still frozen, the outer layer will defrost while the center remains frozen.
Ingredients
- Wheat Flour - 2 lbs
- Dry Malted Milk Powder - 1.1 oz
- Salt - 0.6 oz
- Dry yeast - 1.2 oz
- Chicken Egg - 2 pieces
- Water - 7 fl oz
- 3.2% Milk - 8 fl oz
- Sugar - 3.5 oz
- Butter - 19 oz
Step by Step guide
Step 1
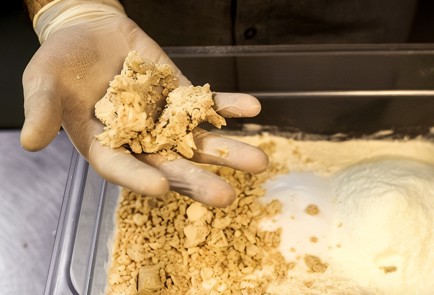
In a dough mixer or any other container, first add the flour, dry milk, salt, and fresh yeast. Gently crumble the yeast with your hands to make it more granular. The ingredients can be mixed by hand, or you can leave them as they are; it’s not essential.
Step 10
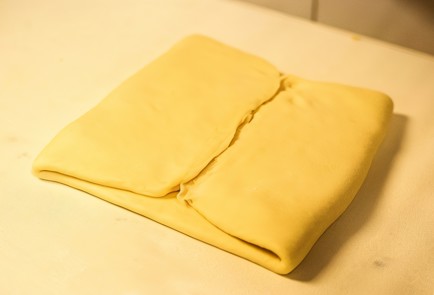
Wrap the butter in the dough like an envelope. Pinch the edges, cutting off any excess dough that extends beyond the butter layer. This gives us a dough consisting of two layers separated by a sheet of butter. Wrap it in plastic wrap and place it in the freezer for 30 minutes. This is necessary for the temperatures of the butter and dough to equalize, allowing them to become one cohesive mixture.
Step 11
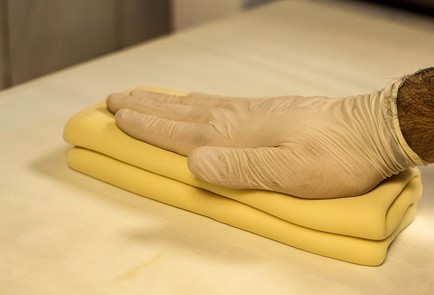
After 30 minutes, take the dough out and roll it out into a sheet with a thickness of 11 mm. Now, you need to fold it like a book to create 8 layers of dough. To do this, fold the edges of the dough from each side to the center. Then, fold the dough in half again (this will give you 4 layers plus 4—making a total of 8). Wrap the dough in plastic wrap and place it back in the freezer for another 30 minutes. Then, take the dough out again, roll it out into a sheet with a thickness of 11 mm, fold it like a book again, wrap it in plastic wrap, and put it in the freezer for another 30 minutes. The dough will now have 32 layers.

Step 12
Take the dough out again, repeat the process, and wrap the dough in plastic wrap before placing it back in the freezer for 30 minutes. The dough is ready. It can be frozen and used within 2 days. The finished dough has 128 layers, not including the butter (these are the light layers). The number of layers affects the flakiness of the croissants. The more layers there are, the more holes or air pockets it contains.

Step 13
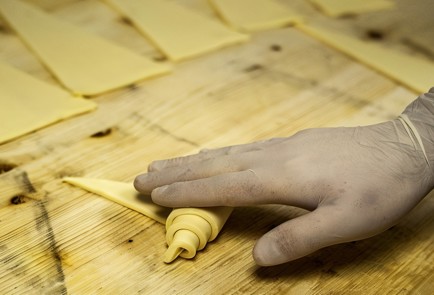
Roll the prepared dough into a rectangle approximately 60 by 35 cm and 6 mm thick. Then cut the dough into triangles.
Step 14
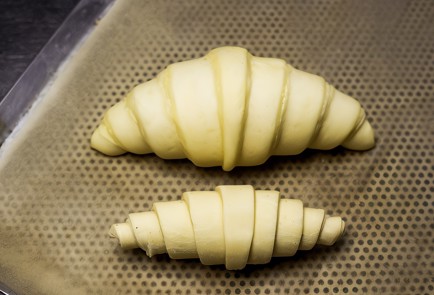
Roll each triangle into a spiral, starting from the thick edge.
Step 15
Croissants can also be frozen (and baked within the same 2 days) — or they can be sent directly to proofing to be baked immediately. To simulate a proofing cabinet at home, place a pot of water in the oven, arrange the croissants on a tray, and put them in the oven for 2 hours. There's no need to turn on the oven; the environment will naturally become warm and humid. The second option is to leave the croissants covered with plastic wrap at room temperature for 5 hours. Proofing is necessary to activate the yeast. After a certain amount of time, the longer the croissants proof, the more bubbles will form inside them and the lighter they will become. The dough after proofing is very delicate. If you gently shake the tray with the croissants, they will quiver slightly like jelly. And if you press down gently on a croissant with your finger, you can feel the tiny bubbles bursting inside. This indicates that the proofing was successful. During the proofing time, the croissants will increase in size by 2.5 times.
Step 16
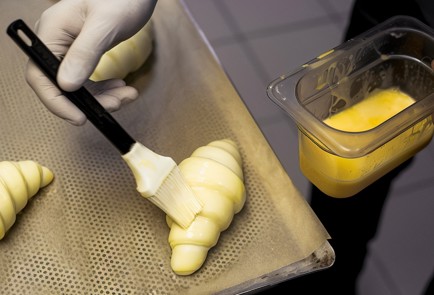
Before baking, brush the croissants with a mixture of egg and water (20 ml of water for 1 egg). It's easier to brush them this way than with pure egg. Be very gentle when brushing the croissants, using a light touch with a brush, and only along the seams, not across, as this could disrupt the structure of the croissant and cause the layers to shift.

Step 17
Preheat the oven to 374°F. When you open the oven, the temperature will drop immediately, so you'll need to adjust it back to 180 degrees. This is done to ensure that the croissants enter the ideal temperature for baking.
Step 18
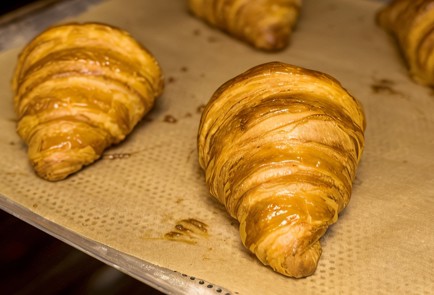
Bake the croissants for about 10 minutes at 356°F, and then another 10 minutes at 320°F. The first 10 minutes are an approximate estimate; it all depends on the specific oven's characteristics. The signal to switch the temperature is when the croissant appears to be ready on the outside. In reality, it is only visually ready, while the inside is still raw, so you need to change the temperature to finish baking it. After that, remove the croissants and let them cool; during this time, they will continue to cook, just like any hot food. Freshly baked croissants are best within 6 hours, after which they won't taste as good.

Step 2
In a separate bowl, mix the egg, water, milk, and sugar. Whisk until the yolk is broken, then pour this mixture into the dough mixer with the dry ingredients. Start kneading the dough. When all the ingredients are visually combined and the mixture becomes more or less uniform, add 40 grams of melted butter.
Step 3
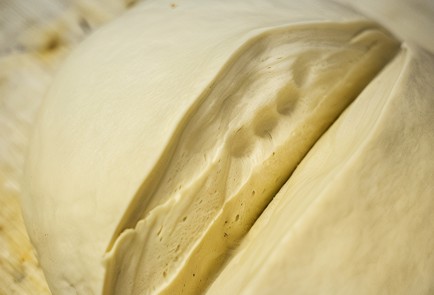
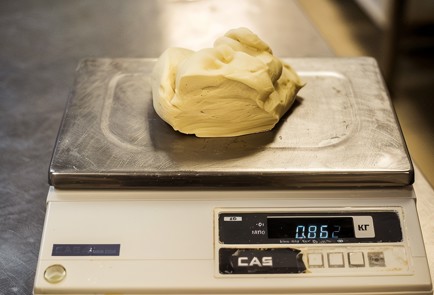
Continue kneading until the dough becomes a smooth, lump-free mass that does not stick to the sides. If you cut a piece of dough, you will see small bubbles inside.
Step 4
Divide the prepared dough into two equal portions, wrap each portion in plastic wrap, and let them rest at room temperature for 1 hour.

Step 5
Divide the softened butter into two equal parts of 250 grams each. Wrap them in plastic wrap and roll out until the thickness reaches 5 mm. Place the rolled-out butter in the freezer to firm up and become a cohesive, pliable sheet.
Step 6
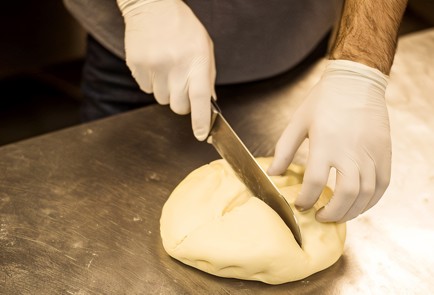
After 1 hour, you can start the first rolling of the dough. There are two ways to roll out a portion of the dough. The first is to stretch the dough by hand and then roll it out a bit with a rolling pin. The second is to cut the round dough ball with a cross pattern, like this.

Step 7
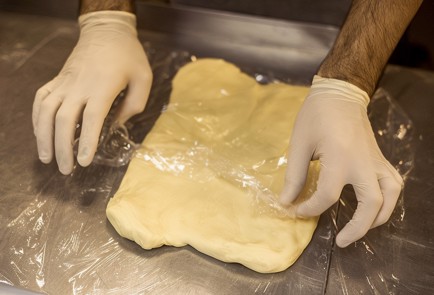
Then you need to fold the corners of the dough outward to create a square.
Step 8
Stretch it out with your hands. Wrap it in plastic wrap and place it in the freezer for 5 minutes to chill slightly.

Step 9
Roll out the chilled dough into a rectangle about 1 cm thick. Place a slice of butter in the center.
Cooked This Dish? Share Your Delicious Creation with the Community! 🥰
Snap a photo and let everyone see your culinary masterpiece. Inspire others and showcase your skills!
Users Photos
No photos yet
Leave a Comment
Please log in to leave a comment.